


If your lawn needs some work and you’re thinking of filling the patchy areas with nice green and healthy grass, you can spread grass seeds or install sod. Grass seeds tend to grow somewhere between 5-30 days depending on the temperature and condition. Now, if you’re all about instant gratification or you simply don’t want to be looking at patches or rock and dirt for weeks, you can choose to lay sod.
While laying sod on the ground sounds simple, there are a couple of tricks to ensure the grass thrives and grows healthy. Follow these steps to avoid the onset of poor grass growth, browning, pest infestation or diseases that might kill your grass.
Step 1. Scope the area for leaks
If you notice any clumpy build up of uneven soil on your lawn, you may be experiencing some leaks. Leakages can kill your grass or make it susceptible to diseases as it leads to overwatering and an excess of moisture. Before you can lay down the sod, it’s best to address any leakages that may be present.
Step 2. Cultivate and aerate the soil
There’s a little bit more to laying sod than just installing it. First, you must till the soil. Tilling the soil breaks up clumpy soil and aerates it, allowing air, water, and other nutrients to seep in deep into the perforated soil. As an added bonus, tilling destroys insect and worm eggs that may be harming your lawn.
Be careful tilling around your sprinkler systems or shallow pipes to avoid damaging them. You can rent tilling machines from your local nursery or home improvement store.
Step 3. Fertilize the soil
So that your sod can thrive, it’s best to fertilize your soil before you lay it down. This will allow the roots to develop stronger. You can top the fertilized soil with slow-release fertilizer to ensure the soil is fortified with nutrients for the grass to use as it grows.
Step 4. Level the ground
Next up is leveling the soil to ensure the grass is evenly spread and your lawn looks pristine. Get rid of any extra soil that will render it uneven to prevent mound-y areas.
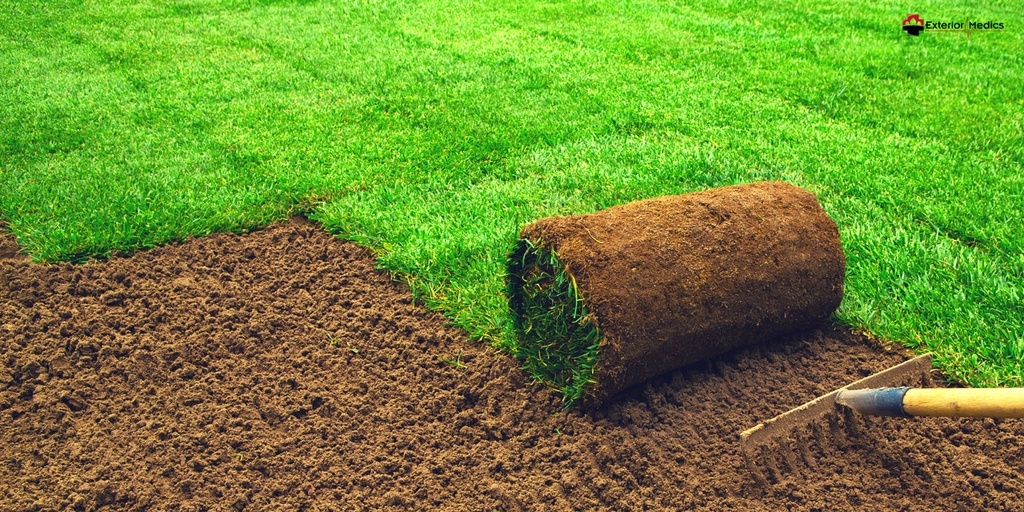
Step 5. Lay the sod
It’s finally time to lay the sod down. Make sure the sod of your choice generally thrives around your area and is well-suited to your climate.
Roll out the sod gently on top of the soil. Make sure the edges of the sod do not align. This will prevent disease from spreading. Use an edger to cut around the edges.
Step 6. Water and enjoy
Water the sod well after laying it down. The first time you water it, make sure the water reaches to about an inch and a half. The grass should feel mushy. For the next two weeks, water the grass for about 7-8 minutes everyday, taking the weather into account. Don’t water when it rains and don’t let your grass dry out.
The grass should thrive if you water it well. Be careful not to overwater or leave your grass parched. Water in the morning before the sun rises and the temperature gets hot to avoid frying the sun upon evaporation.
Hope you enjoyed this article and found it useful. Tune in for more practical tips for improving the home you love! If you love what you see, subscribe to get notifications. Until next time, Greater Washington!


Comments