roof-pillar-6_Hero.jpg

ROOF REPAIR

In an ideal world, your roof would last forever. But as every home owner discovers eventually, roofs inevitably need repair and replacement. Sometimes you can get a full 20 years out of a roof – sometimes more, sometimes less – but there will come a time when it will start to fail.

Fortunately, roof repair options are better than they ever have been. And if you do have to replace your roof, you can expect decades of dependability before you should start worrying about replacing it again

Does Your Roof Need Repairing?

If you are reading this, chances are you have some concerns about your roof. Maybe you have noticed that it looks a little shabbier than it used to. Perhaps you have found a leak. Or you may just know that the projected lifespan of your roof is coming to an end. Whatever the circumstances, it is important to get a clear picture of the state of your roof and to get started on repairs if they are needed. Does Your Roof Need Repairing?
If you are reading this, chances are you have some concerns about your roof. Maybe you have noticed that it looks a little shabbier than it used to. Perhaps you have found a leak. Or you may just know that the projected lifespan of your roof is coming to an end. Whatever the circumstances, it is important to get a clear picture of the state of your roof and to get started on repairs if they are needed.

What to Look For

There are several things to look for to determine if you need roof repairs. These include:
Leaks In The Attic
Use a flashlight to search for signs of water damage.
Check Your Records
A standard shingle roof is made to last between 20 and 25 years.
Too Much Moss
A significant growth of moss can indicate roof problems.
Look For Granules In The Gutters
When shingles start to shed a substantial number of granules they mayneed replacing.
Keep An Eye Out For Damage
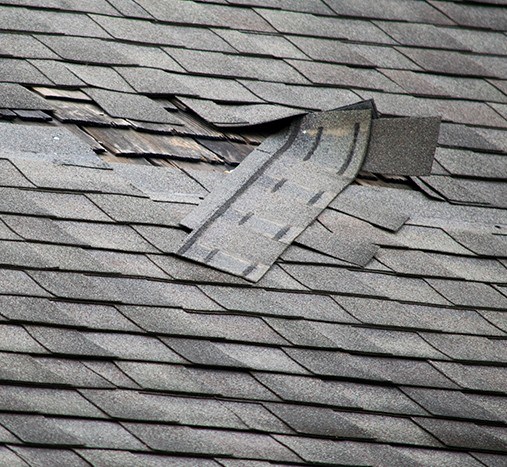
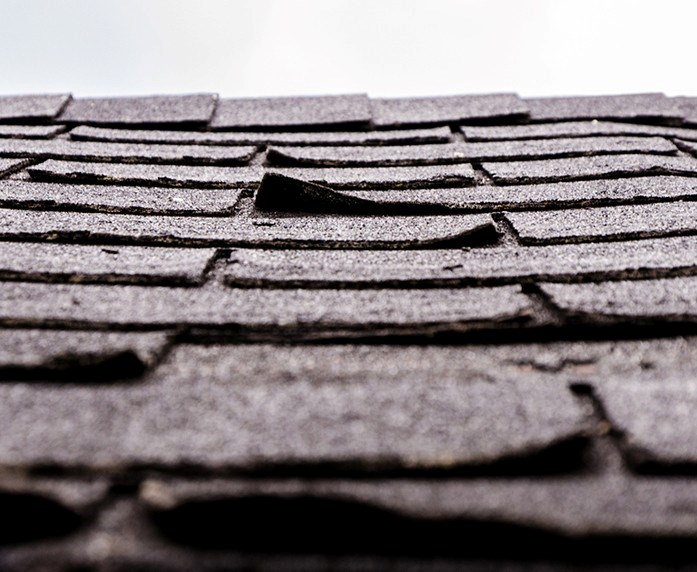
If shingles are sticking up, shifting around, or if the roof is dipping in, you need repairs.

How To Find A Contractor

If you discover signs of roof issues, you need to bring in a qualified contractor to look things over. Try to choose a contractor that has a good reputation in your area. You can search through reviews, talk to your neighbors and even give a few different companies a call to get a feel for who you want to work with. Whoever you choose, make sure they are licensed and insured.

Don’t Wait For Repairs

It can be tempting to put off roof repairs until they are necessary. Unfortunately, small problems can quickly become big problems when it comes to your roof. Even one little leak can eventually cause extensive damage to both your roof and the interior of your home. It is far better, and often cheaper, to get repairs done now rather than wait until later.

Roof Repair Types & Methods

If you are reading this, chances are you have some concerns about your roof. Maybe you have noticed that it looks a little shabbier than it used to. Perhaps you have found a leak. Or you may just know that the projected lifespan of your roof is coming to an end. Whatever the circumstances, it is important to get a clear picture of the state of your roof and to get started on repairs if they are needed.
Shingle Repairs
Contractors can repair most types of shingles, including asphalt, cedar shake and shingle, slate and synthetic slate.
LEARN MORE +
Flat Roof & Metal Roof Repairs
Contractors can also repair roofs without shingles, such as flat roofs and metal roofs.
LEARN MORE +
Chimney Flashing Repairs
Often chimney flashing can start to pull away and degrade, leading to leaks. It may need to be replaced if it cannot be repaired.
LEARN MORE +
Repairs Of Ice Damage
You may notice that ice piles up at the edges of your roof. The damage can be repaired, and improvements can be made to the roof to prevent ice dams in the future.
LEARN MORE +
Asphalt Shingles

Asphalt Shingles

Asphalt shingles are so popular and widespread due to their combination of affordability, durability, customization, and ease of service. They are ideal for use in the Northern Virginia climate, offering a lifespan of up to 30 years in the right conditions.

LEARN MORE
Cedar Shake

Cedar Shake

Cedar shake is one of the most durable roofing materials available, holding up to ice and hail better than most other materials. It is also beautiful, weathering to a nice gray and silver coloring over time. Another benefit of cedar shake roofing is its green qualities. Biodegradable, renewable and able to be harvested sustainably, it is a great choice for those who want to be environmentally friendly.

LEARN MORE
Metal Roofing

Metal Roofing

In recent years metal roofing has become more affordable and better constructed, making it a great choice for many homes and commercial applications. Metal roofing also offers the advantage of being the material with the lowest maintenance needs of any roofing material.
LEARN MORE
Synthetic Slate

Synthetic Slate

While genuine slate has many great qualities, it is also costly and heavy. Synthetic slate offers a nice, attractive alternative. Made from rubber and plastics, synthetic slate, also known as shake, is available in many different colors, and is also quite durable. It can withstand wind, rain, fire, mold, and algae in ways that genuine slate cannot.
LEARN MORE
Genuine Slate

Genuine Slate

Genuine slate is found on the roofs of many historic buildings and homes throughout Northern Virginia – still holding up after many decades. That is because slate roofs are extremely durable, although the material does become brittle over time. Older genuine slate roofs should only be repaired by professionals experienced with the material to avoid unnecessary damage.

LEARN MORE
Flat Roofs

Flat Roofs

Flat roofs are durable, easy to maintain and offer several other advantages, including being cooler than many roofing materials.

LEARN MORE

Typical Costs of Roof Repairs

The cost of roof repairs can vary significantly based on the type of roofing material, the type of repair and the extent of the damage. Some of the average costs for roof repairs include:
Asphalt Shingle Repairs

Around $120 per 100 square feet

Cedar Shake Repairs

Around $600 to $900 per 100 square feet

Genuine Slate Shingle Repairs

Around $1,000 per 100 square feet

Metal Roof Repairs

Around $1,500 per 100 square feet

Roof Repair Permit

Repair permits can range from $200 to $400 depending on the area

Chimney Flashing Replacement

Typically ranges between $200 and $500

Shingles Are Purchased by the Sq.

All shingles are sold by the square, which is a 10-foot square area worth of shingles. Your roof repair costs will include the cost of the square of shingles even if your actual repairs require less than a square. However, the company that repairs your roof will leave you the remaining shingles for use in later repairs.

Permits Can Be Based on Home Size

The cost of roof repair permits can vary from area to area. Some areas offer roof repair permits for a flat fee, while other areas base the cost of permits on the size or square footage of the home.
Shingles.jpg

Damage Beyond Shingles

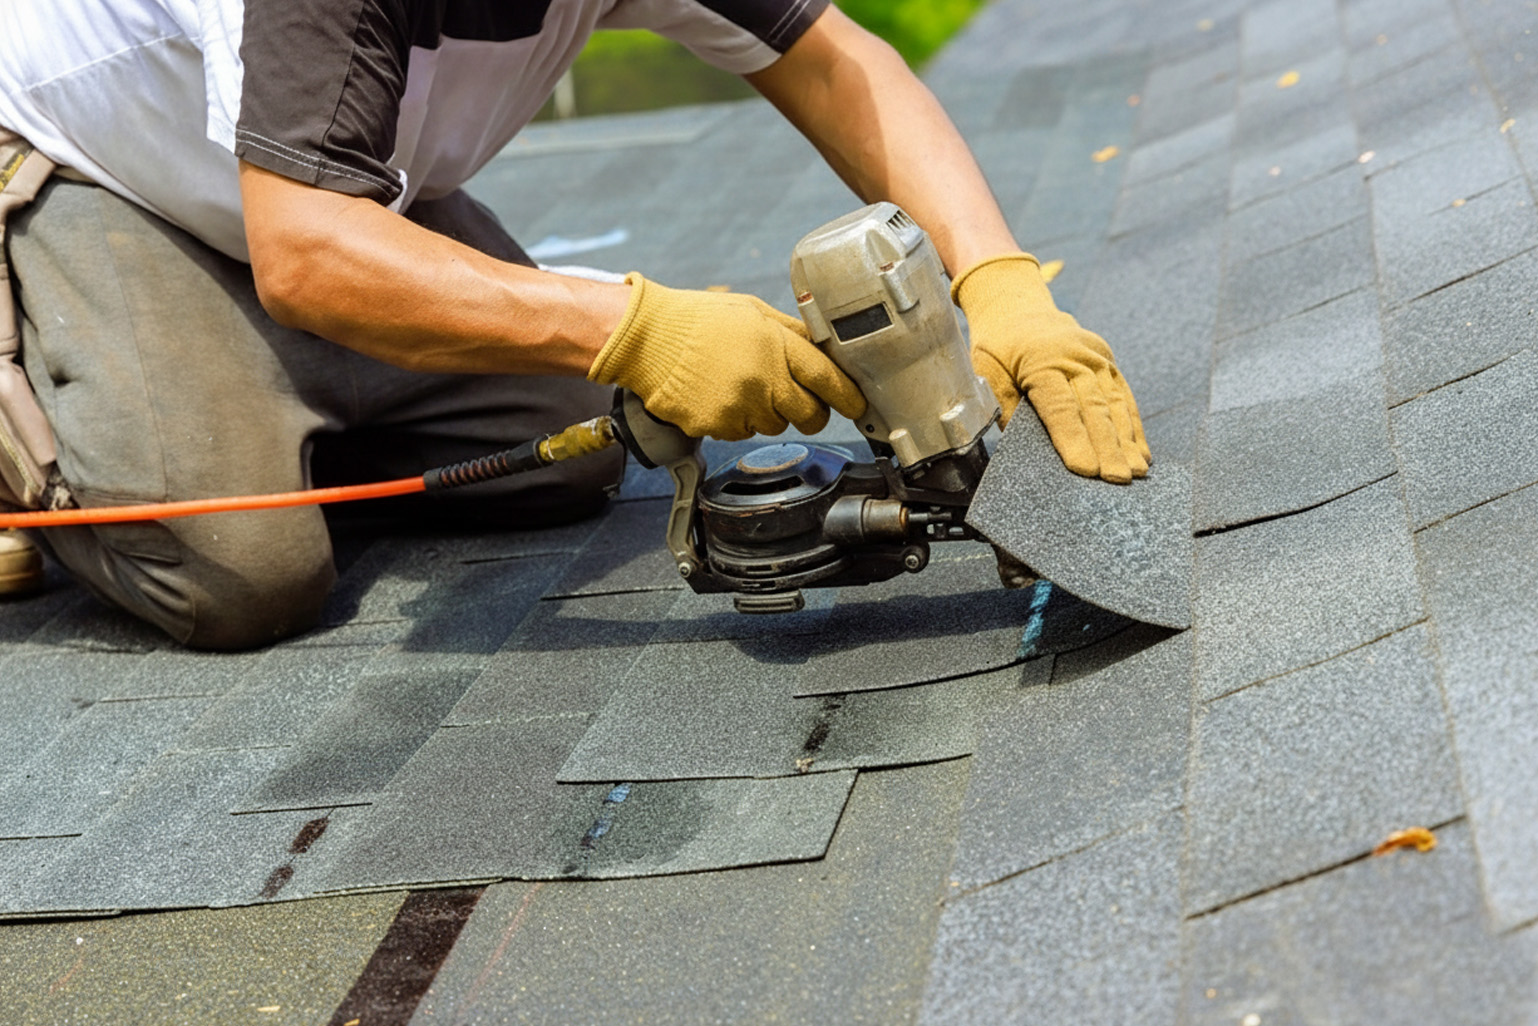
Replacing shingles requires purchasing materials – the shingles – and paying for the labor required to remove the old shingles and install the new shingles. However, there are sometimes other costs based on the extent of the damage to the home.
If water made its way into the home through damaged shin- gles, then you may need further repairs – such as replacing the underlying structural materials of your roof. Depending on the extent of the damage, the costs can be significantly higher than the cost for the roofing materials.

How Long Does it Take to Repair a Roof?

As with the costs of roof repair, the time necessary to complete the repairs can vary significantly based on the extent of the roof damage. Some common roof repair times include:
A Simple Leak - If you only have a small leak in your roof, often caused by a damaged shingle, it may take as little as 30 minutes to an hour to repair.
Regular Roof Maintenance - Regular maintenance for a roof can take about a single day, such as if you have some loose shingles that need repairing and some minor roof leaks.
Full Roof Restoration - If the damage to the roof is extensive, it can take as long as a week to finish the repairs.

Different Materials, Different Repair Times

Asphalt shingle roofs are the easiest to repair. Most repairs can be completed relatively quickly. But the more difficult the material is to work with - such as cedar shake or genuine slate – the longer the repairs tend to take.

For instance, repairing a genuine slate roof can take much longer than repairing an asphalt shingle roof. The slate shingles are considerably heavier than asphalt shingles. The heavier shingles are more difficult to get up on the roof, and more difficult to repair and replace. The older the slate roof, the more carefully the repair person must be to avoid damaging the roof.

Taking the Time to Do It Right

No one wants to wait around forever for a roofing repair company to finish a job. But you also want to know that the repair work done on your roof is high quality and that you can depend on the repairs to last. Avoid choosing a roofing repair company just because they promise the fastest repair times. It is better to hire a company that will take the time to do the job right.

15 Most Common Roof Repair Issues

Roof damage takes many forms. In order to prevent more damage to your home, it is important to check for as many types of roof damage as possible. Here are the most common types of roof damage to look for during your next routine maintenance check. If you find any of these issues contact us for the solution.

01. Leaking Roof

Most leaks occur at points where something penetrates the roof, such as pipes, vents, etc. These are the areas where you should search first for the source of the leak. If you are unsure, you can use a garden hose to saturate the area you suspect and see if you notice water penetration.


If the leak is coming from a gasket or caulking, remove and replace the seal. Just remember that simple caulking will not fix most leaks for long. You should try for mechanical solutions – like new flashing – instead of relying on caulk.

If you cannot find the source of the leak, or if you find that you have many leaks and substantial degradation of wood (and often mold), it is time to call in a contractor.

02. Lifted shingles

Having one or more lifted shingles is common as a roof ages. Fortunately, they are usually easy to repair. Bring a small whisk broom and some roofing cement with you up on the roof. Locate the lifted shingle and lift it to sweep away any debris underneath. Ideally, choose a warm day to do your repair, as the shingles will be less likely to break. 


Once the area underneath is relatively clean, apply a dab of cement and press the shingle down. Stand on it for a few minutes, or weight it down with something, to ensure the cement holds it in place.

If the lifted shingle breaks, or if you cannot get it to stay flat, it needs to be replaced. Avoid using nails to stick it down, as they create another way for water to get in.

03. Standing water

A little standing water on a flat roof is to be expected, but a deeper puddle that sits for an extended period indicates a problem. First, clear out the gutters to ensure proper drainage and check to see if the problem is fixed. If not, you can build up the roof in that area. Just make sure to dry the area first.


Use rolled asphalt roofing to create larger and larger patches to build a dome over the puddle. For instance, if the puddle is 10 inches across, cut a circle of material that is 12 inches. Cut a 14-inch patch, apply it over the 12-inch patch. Keep expanding by 2 inches until you have built a dome. Then cover it with nylon fabric and rubberized coating to waterproof it.

If the roof is squishy underneath the puddle, repairs will require replacing the structural components under the puddle.

04. Holes in the roof

Holes in the roof can be caused by events like storm damage, or may result from the removal of something that penetrated your roof – like a vent. The hole must be repaired for the roof to be functional, so the repair should be a top priority.

Repairing a hole requires removing the shingles surrounding the hole, patching the hole and ensuring the patch is structurally sound, then covered over with roofing felt and new shingles. Small holes can be patched using plywood cut to the shape of the hole and a board long enough to attach on each side of the hole inside the roof for support. For larger holes, it is better to cut back the roof sheathing and attach the plywood patch directly to the trusses.


After you have patched the hole, cover it with tar paper or roofing felt using a large enough piece to tuck under the shingles above the hole, then attach new shingles.

If the damage has affected the trusses or rafters, or the hole is quite large, hiring a qualified contractor is recommended to ensure the structural integrity of the roof.

05. Poor construction or bad previous repairs

If you notice that part of your roof looks unusual or uneven, examine the area more closely. You may discover that it was built or repaired incorrectly. Sometimes homeowners will attempt their own repairs to save money, or hire someone to make the repairs that is unqualified to do the work. It may be difficult to detect poor construction or bad repairs if you are not familiar with roofing. If you are unsure, contact a qualified roofing repair company for a consultation.


Some bad repairs are easy to fix yourself. If you notice shingles that were repaired incorrectly – such as crooked shingles or shingles that are not attached correctly – you can replace them. You can also install your own roof flashing if you notice the flashing on your roof was installed incorrectly. More significant problems, like a warped roof, will require a contractor to repair.

06. Shrinking

Roof membranes and rubber roofs can shrink over time, which can result in separation from flashing and other parts of the roof. The areas where the membrane pulls away are going to be susceptible to water penetration. Shrinkage can also lead to cracking and tearing of the membrane. Shrinkage is relatively easy to spot by looking closely at the border between the membrane and the rest of the roof.

All the areas where the membrane has pulled away or torn must be repaired to protect your home. 


Gaps created by shrinkage are usually repaired by cutting away the section along the gap, allowing it to shrink for an hour or so, and filling in the gap with more material and/or sealant.

A properly installed rubber roof or roof membrane should be designed to account for possible shrinkage, but not all roofs are properly installed. If you discover a little shrinkage and a few gaps, repairing it yourself is an option. But major shrinkage and numerous gaps or tears will require the attention of a roofing contractor, and possibly replacement of the membrane.

07. Splitting

Both roof shingles and roof rafters can split. Split shingles are easy enough to repair. Simply replace the shingle with a new one. But split rafters require more care and attention. Rafters that split must be repaired, and repaired correctly, to ensure that the roof is structurally sound.

Repairing a split rafter on your own requires taking measurements and doing calculations to make sure you add enough support through your repairs. Then you will need to purchase a piece of 3/16-inch-thick angle iron to attach to the rafter using carriage bolts. 


The angle iron should be three times the length of the split and the width on the larger side should be the same width as the rafter. You will most likely need to have the angle iron cut to fit your specific needs. Drill holes every 6 inches and use ¼-inch bolts to attach the iron to both the wider and the thinner sides of the rafter, placing the nuts on the iron-side of the holes.

If the split is substantial, or if you have any doubts about your ability to make the repairs, you should call in a contractor. It is much better to be safe than sorry when it comes to split rafters.

08. Loss of granules

Granules are added to asphalt roof shingles to make them stronger and more resistant to the elements. As the roof ages, the granules will start to detach. If you check your gutters and notice a lot of granules, it is a sign that your roof is getting older and coming closer to needing repair/replacement (or that you just experienced a hail storm, which can knock off quite a few granules). 


But granule loss does not necessarily mean you need to rush out and get your roof replaced.

To get a better idea of the condition of your roof, you will need to look at the actual shingles. When your shingles lose almost all their granules, they will start to degrade more quickly. At this point you will need to start preparing yourself for repairs and/or replacement. A roofing contractor can tell you just how close you are to needing a roof replacement.

09. Small animal infestation

Small animals love the warmth and dryness that is found under your roof. Squirrels, mice and other critters will set up a home if they can get into your attic or anywhere that is relatively secure and protected by your roof. If you notice signs of a small animal infestation, such as animal smells, droppings, urine, sounds of animal scurrying about, then it is time to clear them out and secure your roof against further infestations.

Most animals will run away when approached, so you can usually get the animal to leave by approaching the area of infestation to clean it out. Be careful, however, because small animals will often bite if cornered and can carry diseases. 


Wear protective clothing and consider covering your mouth/nose to avoid inhaling droppings. Clean and disinfect the area, then identify the point of entry and patch it to prevent reentry.

Larger infestations, or infestations of possibly dangerous animals/insects, are best handled by professionals.

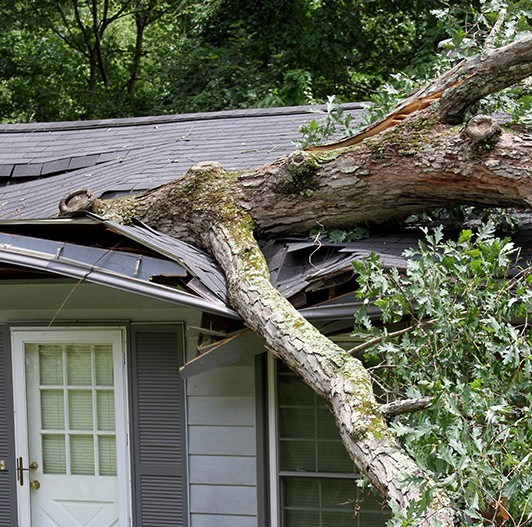
10. Tree damage

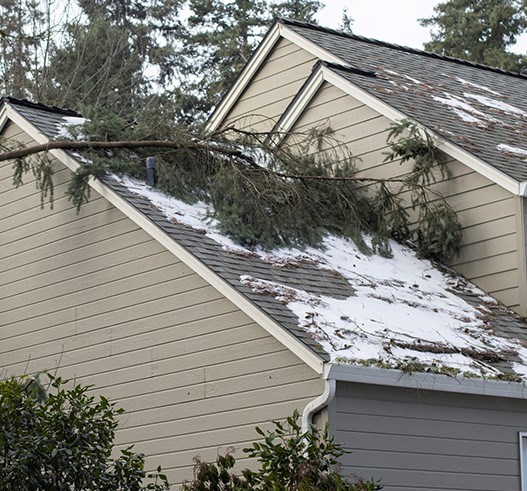
Tree damage can range from torn up shingles and minor roof leaks to large holes in your roof – or even knocking out a whole section of your roof/home.

Minor tree damage can be repaired by first removing any tree branches that remain, cleaning up the area, and assessing the actual roof damage. 


For small holes, clean up jagged edges, remove shingles surrounding the hole, cut and fit a patch, support the patch with wood attached underneath the patch and attached to the surrounding roof, and then cover with tar paper or roofing felt and install new shingles.

More significant damage, especially damage to roof rafters or other structural damage, should first be assessed by a qualified roofing contractor. The structural issues must be repaired first before the actual roof is repaired.

11. Poor Roof Ventilation

You can identify ventilation problems with your roof most easily in winter, when moisture tends to collect and ice dams will often develop on the edges of the roof. Ice dams are obvious signs of ventilation issues, but you can also spot moisture accumulation in your attic in cold weather. Wood may be darkened from moisture penetration, or frost may develop.


If you do have bad ventilation, you can remedy the problem by installing Soffit vents, roof vents or ridge vents. Soffit vents are most efficient at increasing ventilation. A basic Soffit vent is a simple rectangular hole cut into the underside of the roof near the edge of the eaves, then covered with a metal vent cover.

A contractor can help to assess what type of vents will work best with your roof, and ensure that those vents are installed correctly to maximize ventilation.

12. Bad gutters

Gutters play an important role in protecting your home. Damaged or leaking gutters can cause water to accumulate in the gutters, which can freeze and rip the gutters away from the house. Leaking gutters can also pour water around the edge of the home, which can damage the foundation and/or freeze, creating slip and fall hazards.

If you notice your gutters are leaking or damaged, you can usually repair them yourself. Scoop out debris, rinse the gutter out and search for leaks. Most of the time leaks develop at seams. 


For leaking seams, apply a silicone sealant to the seams when dry and clean. Look for areas where the gutter has pulled away from the home and reattach it.

If you cannot find a good attachment point due to rotten wood, it may be time to bring in a contractor to repair structural damage to the roof.

Most damage to gutters is caused by debris accumulation. Keeping your gutters clean will help keep them in good working order.

13. Neglect

One of the biggest challenges with keeping a roof well maintained is remembering to conduct periodic inspections and routine maintenance. The roof is often out of sight, which makes it easy to forget about for extended periods of time. And many homeowners who have recently purchased their homes discover that the previous owner failed to take care of the roof. Unfortunately, neglect inevitably leads to damage.

You can spot signs of neglect by taking a closer look at your roof. Excessive moss accumulation, an absence of granules on the shingles, curled or split shingles, sagging, leaks – neglect can lead to a range of different issues. Some of them are easy to fix, while others are much more difficult.


If you look at your roof and determine that it has been neglected, try to assess the extent of the neglect. Gluing down a few shingles that have popped up is not difficult. But repairing sagging, major leaks or replacing the entire roof is much more challenging.

Having your roof examined by a roofing professional is the best way to determine the extent of the damage caused by neglect. Once you know exactly what is wrong, you can decide what to fix yourself and what to leave to the professionals.

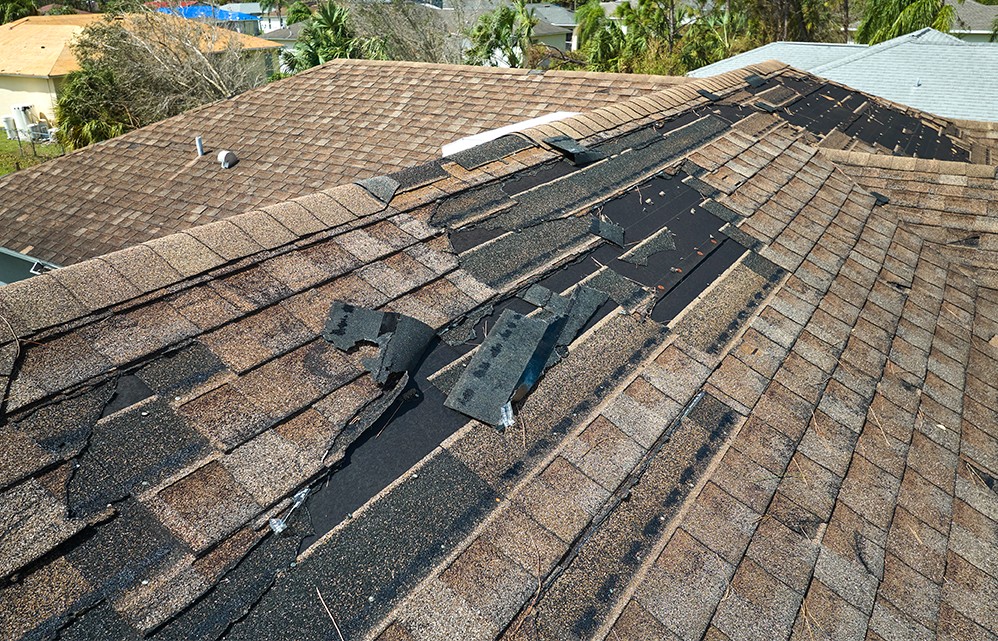
14. Storm damage

Wind, rain, snow, hail, flying debris – storms can cause significant damage to your roof. If you notice damage after a storm, it is important to contact your insurance company to report the damage and determine if repairs are covered under your policy.

Minor storm damage can include lifted or missing shingles, small leaks and leaking gutters. You can reattach or replace shingles using roofing cement. Small leaks can be repaired by patching the hole in the roof and/or replacing the shingles/roofing felt that was damaged by the storm. Leaking gutters can often be re-sealed using silicone sealant, and detached gutters can usually be reattached without too much difficulty.


Major storm damage, such as larger holes in the roof, major leaks or structural damaged should be examined by a roofing professional to determine the extent of the damage and the exact repairs that should be done. Major damage can include structural damage, which must be repaired correctly to ensure that the roof is sound and safe.

If your home insurance covers the repairs, it is in your best interest to contact a contractor to guarantee that the repairs are done correctly.

15. Defective flashing

Flashing is the metal pieces that shed water away from areas where it might accumulate on your roof. You will find flashing around your chimney and around other areas where water needs to be redirected. Flashing is a necessity in roofing, as it is much more reliable than sealant alone – roofs and the underlying structures move and expand, and flashing is durable enough to hold up to that movement.

Flashing can be defective. More often, flashing is installed incorrectly or damaged accidentally. Once the flashing is no longer properly placed, water will begin to accumulate. Leaks develop and the flashing must be repaired to protect the home.

Flashing installation varies by the area of installation. One of the most common flashing repairs is the flashing around the chimney.


There are two components to chimney flashing – the flashing around the base, and the cap, which should be mortared into the chimney.

To repair the cap, you will need to remove the cap from the mortar, clean out the gap of old mortar, and apply new mortar into the hole. While the mortar is still wet, press the cap back into the hole and wait for it to dry. Seal the flashing where it meets the mortar.

To repair the base, clean the area of debris and chisel away the old roofing cement. Apply roofing cement to the back of the flashing and attach it tightly to the chimney under the cap, securing it with fasteners such as masonry nails. Seal the heads of the fasteners with roofing cement and do the same to the top edge of the flashing.